taxidermy

Taking Care of Your Trophy

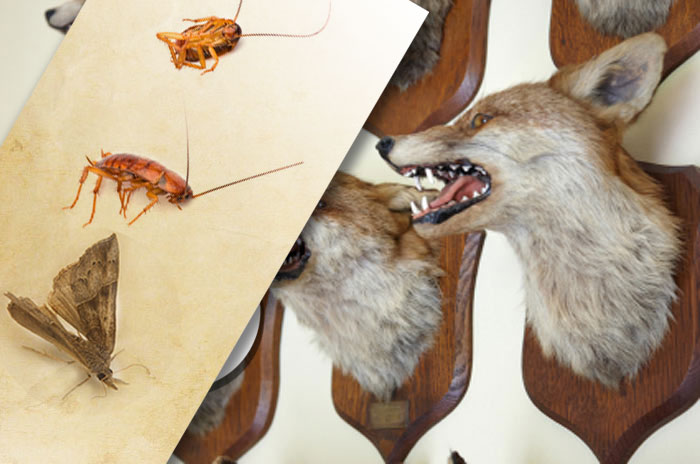
Simply because a hide has been preserved and mounted doesn’t mean that it won’t require any further care. While trophies that exhibit better quality work tend to not require as much maintenance as those with careless or shoddy workmanship, all trophies will eventually need to be taken care of, and possibly even refurbished. However, by taking into account the kinds of things that can cause a trophy to degrade over time, it’s possible to avoid most common types of damage.

Taking Care of Your Trophy An ounce of prevention is worth a pound of cure, so the best way to take care of your trophy is to keep it from needing any extra maintenance in the first place. Keeping mounts in climate controlled areas, away from dampness, and out of sunlight will go far in preserving the integrity of the hide, the hair, and the coloring. Cool, dry places away from light are the best places for trophies. Excessive dampness can lead to mold and mildew, while overly hot, dry conditions can desiccate the hide and cause it to crack or split. Dust and skin oils will discolor fur or hair, so mounted animals should be given frequent gentle dusting, and not touched more than absolutely necessary. While discoloration won’t actually damage the hair, it will make it look dirty, and it can be very, very difficult, if not completely impossible, to remove. Dirty hides don’t look realistic, so poor trophy hygiene can ruin the effect of even the best taxidermy. Like any other piece of expensive decorative artwork, a trophy should be kept and handled the same way one would treat a fine, valuable painting.

After a trophy has been damaged by sun exposure or the effect of time on poorly-done taxidermy, there’s not much that beginning taxidermy hobbyists or laypeople can do, aside from re-gluing the occasional lost eye. Fortunately, however, there are professionals who have a lot of experience in restoring old, museum-quality taxidermy pieces and antique heirloom trophies, and are able to fix some common problems old mounts run into. Cracked or split hides can be re-glued, and sun-faded fur can be dyed back to its original color. However, many of these fixes are complicated, time-consuming, and expensive, and well worth avoiding if at all possible.There’s also a limit to how many times a hide can be dyed or glued, so the longer a trophy can go between needing maintenance, the better.

Taking proper care of a mounted trophy is fairly intuitive. Excessive handling, sunlight, head, and wetness can cause the hide and fur to degrade, so they should be avoided. Keeping this in mind will allow you to appreciate your fine trophies for decades, without having to resort to expensive refurbishing or repairs.

Making Taxidermy Your Hobby

Making Taxidermy Your HobbyEven if you don’t work in a museum, taxidermy is a fun and fascinating hobby that’s surprisingly easy to get into. Most hobby taxidermists take it up for one of two reasons- they also enjoy hunting or fishing, or they want to learn the skills to add to their other visual artworks.

For hunters and fishermen, taxidermy is a great way to preserve trophies. Unfortunately, commissioning a professional taxidermist to create a lifelike trophy can be expensive. With the right know-how, however, it’s possible to avoid this cost, and end up with a high-quality end product that’s still perfectly posed and mounted. Many of the necessary tools and materials are available online, including tools to sculpt a mount, stretch the hide, sew it closed, and even add other small artistic touches like realistic glass eyes or artificial teeth.

For artists, taxidermy is becoming an avant-garde addition to many other visual arts disciplines. Painters and sculptors, in particular, are seeing a revival of taxidermy, as artists incorporate both antique and vintage specimens, and more modern specimens in everything from sculptures, to dioramas, to paintings, to other pieces like artistic hair or clothing designs. Some enjoy combining two or more animals to create a fantasy creature- lambs and goats become unicorns, fish become mermaids, and some others are even more exotic. Special materials are available for these pieces, as well, like dye, special armatures for wings, horns, and glass eyes in beautiful, unusual patterns and colors.

Once you’ve elected to pursue taxidermy as a hobby, it’s necessary to find out where you’ll get your materials. If you’re a hunter, or know one, that’s easy enough. If you’re an artist, you may find inspiration in picking up vintage specimens from an antique shop or estate sale, or even in using leather or fur garments to create a creature. Some artists don’t use skins at all, preferring to work with antlers, shells, skulls, or bones instead. The only limit is your imagination, and very beautiful pieces ca be created from some very humble beginnings, after a bit of practice. While taxidermy is a great way to use every part of a hunted animal and ensure nothing goes to waste, many groups take a very negative view toward killing an animal solely for the purpose of creating a taxidermy piece. Therefore, it’s very important to always approach this art form with a level of ethical treatment and respect for the subject.

Once you’ve chosen to pursue taxidermy as a hobby, you won’t be disappointed. A fascinating discipline with a long history, taxidermy is a great way to help preserve part of the natural world, as well as expand your artistic horizons.

Victorian Taxidermy

Taxidermy before the Victorian and Edwardian eras was a rather crude affair, mostly used by hunters, explorers, and scientists to preserve specimens for lack of a better method. It was only during the beginning of the 20th century that taxidermy really evolved into the art form seen today.

Prior to the 20th century, most “taxidermists” would really have been upholsterers, who treated the tanned animal hide like a chair cushion. After it had been tanned at a tannery, the hide would be sewn up and stuffed with what was available, usually cotton, rags, sawdust, or similar materials. Unfortunately, this produced some very saggy, shapeless, terrible-looking end products, and the practice gave taxidermy a rather bad reputation. What was even worse, however, was that items like glass eyes or artificial noses were not yet in use. Since these body parts couldn’t be treated by tanning the same way leather could, they were often left as-is, which meant that they would decay over time. So, in addition to not creating lifelike mounts of hunters’ kills or biological specimens, this mode of taxidermy failed at adequately preserving the pieces it made.

Victorian Taxidermy

Victorian Mounted Head of Sable Antelope

During the early 20th century, the practice of “stuffing” animals began to fall by the wayside in favor of mounting them over more anatomically-correct wooden models. The skins would generally still have to be filled out with some form of stuffing, however, unlike the boneless things of the 18th and 19th century, Victorian taxidermy specimens more closely resembled their living counterparts. As big game hunting came into fashion, wealthy sportsmen (like then-President Theodore Roosevelt) began to commission taxidermists to make hunting trophies for them. Unlike the lifelike poses most specimens are placed into today, the fashion for Victorian taxidermy was to place creatures in particularly savage, snarling postures that emphasized the bravery of the hunter who’d taken them down. These were generally used as décor pieces in sitting rooms or libraries in Victorian homes. Fortunately, since glass eyes and other artificial soft tissue parts were in use by then, the display continuing to decay was not an issue.

Some taxidermists, however, were less interested in creating a realistic look than in using specimens (usually small ones, like rabbits or squirrels) to set up little tableaux. Walter Potter is perhaps the most famous example of this art form, as he created several famous dioramas of rabbits at school, guinea pigs playing in an orchestra, and kittens having tea. Most of his work didn’t simply involve mounted animals, either- almost all of them had extremely detailed, suitably miniaturized props and costumes, as well.

Though Victorian taxidermy was still a ways off from resembling the highly realistic specimens modern taxidermy produces, it was during this time that it really began to develop into a sophisticated skill. While previous specimens were only good for preserving unusual animals or kills out of necessity, the 20th century took taxidermy into being a sought-after decorative art form.

Types of Taxidermy Kits

Many beginning taxidermists find it easiest to start working with a taxidermy kit. Kits have the advantage of containing all or most of the supplies needed to create a finished piece, often for a lower cost than purchasing all of the items separately. They also come in various types, depending on the application.

Deer and other horned and hoofed animals have a whole variety of kits to themselves. There are types to preserve deer hooves (or even make them into a variety of décor items), rumps, antlers, and the head and shoulders of the animal. For a true beginner, it’s probably best to start small. Most of these kits contain a variety of solutions and instruction guides, to teach novice taxidermists all of the steps of animal mounting, from skinning the deer, cleaning the skin, preserving the hide, to finally stretching it over the proper mannequin.

Kits also exist for mounting whole animals in a variety of sizes, usually using polyurethane models sculpted by wildlife artists. Once the taxidermist has followed the kit’s guides to cleaning and preserving the hide, it can then be stretched over the model, leaving the taxidermist with a lifelike mount that won’t end up degrading over time like old stuffed animals used to. Many of these kits also include highly detailed glass eyes, which contribute to the mount’s realistic look.

For true beginners who don’t feel up to the challenge of skinning an animal and tanning a whole hide just yet, there are some skull preserving kits that give a very polished-looking end product, without all of the effort or skill needed to mount an entire animal. These are generally very easy to use, and consist of a solution to clean the skull of bits of flesh and soft tissue, and a sealant to protect the skull from damage due to time and sunlight exposure.

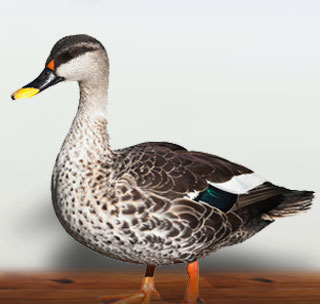
Lastly, there are specific kits for other, non-mammalian animals. Bird taxidermy is very popular, particularly among duck and goose hunters, but the particular consistency of bird skin and feathers requires different products and procedures than mounting a mammal. Birds have their own polyurethane mannequins, as well, which allow them to be mounted in a sitting, standing, or flying position. Kits also exist for preserving fish or reptilian specimens, though these are often viewed as being much more challenging than animals or birds, since the composition of their skin makes preservation and mounting much more tricky.

Though taxidermy is a highly evolved visual art form, beginners can take advantage of others’ experience by starting out using taxidermy kits. These can help teach novice taxidermists about the necessary steps, skills, and chemicals required to turn out a high-quality mount, making it possible for even a complete beginner to create a beautiful finished piece on their first try.

Advancements in Taxidermy

Though people generally think of old, dusty museum specimens when they think of taxidermy, the art of mounting animal hides has undergone a tremendous amount of advancement. To understand exactly how far it has come, however, it’s necessary to look back at its origins, first.

Taxidermy Hobbyist - Advancements in TaxidermyTaxidermy has existed since man began hunting. Archeological evidence of very early taxidermy shows the remains of animals draped over rocks and blocks of wood, which experts speculate may have served either a totemic purpose, or simply served as target practice for novice hunters. Taxidermy that would be recognizable to modern eyes, however, didn’t really begin until the 18th century.

During the 1700s, taxidermy served a dual purpose- it preserved a hunter’s kills, and it saved unusual biological specimens. Explorers like Darwin and Cook needed taxidermy to preserve the new species they found in their travels, since the only way to do so prior to that was to paint or draw the animal, a practice which was fraught with inaccuracy. Unfortunately, most actual taxidermy was done by upholsterers, who simply sewed up the skin and stuffed it with whatever material was available- cotton, wool, rags, sand, sawdust, or something similar. Since stuffing has a tendency to settle, time and gravity made these “stuffed animals” turn out very badly, which is why modern taxidermists prefer the term “mounting” over “stuffing” today. Coupled with the lack of mounting skill back then was the fact that replacing items like eyes, tongues, or noses wasn’t yet common practice. Since these parts don’t react to tanning the same way leather does, they would continue to break down long after the hide was stuffed, making taxidermy a rather poor means of preservation.

In the Victorian era, taxidermists began to take an interest in creating more lifelike mounts. Wooden models were used, which the skin could be stretched over. Though many specimens still required some degree of stuffing, these end products were far more anatomically accurate than the previous “stuffed” animals. Eyes and other soft tissue parts began to be replaced with wood and glass at this point, which meant that some of the best examples of Victorian taxidermy still survive today.

In the mid-1970s, once plastics began becoming more and more abundant, polyurethane foam models began to be used instead of the older, wooden Victorian ones. These had the advantage of being lightweight, and their shape and ability to be sculpted meant that stuffing was no longer required. As a result, modern taxidermy pieces have a much more anatomically correct, natural look than older specimens, and do not shift or decay. Well-done modern taxidermy is rightly considered sculptural wildlife art, and is invaluable for preserving and demonstrating animals in museums, though other artists choose to take their work in a more surrealist or horror direction.

The art of taxidermy has advanced greatly from the first lumpy, stuffed hides from the 18th century. Modern pieces are not only visually stunning, but lifelike and long-lasting, as well.

Learning About Different Types of Taxidermy Tools and Techniques

Learning About Different Types of Taxidermy Tools and TechniquesAn animal skin goes through a lot of steps before it becomes a finished taxidermy mount, and each one of these requires certain tools. While some applications, like birds or some fish, might require more specific tools, there are a few general types of items that every taxidermist should be familiar with.

The first, and probably the most obvious, is a good pair of safety glasses. A lot of the solutions used to clean and preserve hides can do some serious damage if they come in contact with your eyes, so no part of skin cleaning or preserving should be undertaken without them. Similarly, rubber aprons and latex gloves should be worn at all times.

After that, cutting implements like scissors, scalpels, exacto blades, filleting knives, fleshing tools, and even sharpened spoons are key, not only for removing the hide from the body, but for removing the clinging bits of flesh and soft tissue from the skin. Sharpened spoons or specialized fleshing tools can be (carefully) scraped along the inside of the unpreserved skin to loosen and remove remaining bits of muscle tissue, and prepare the skin for the tanning process. The type of knife needed to remove the skin depends not only on the size of the animal or area of the body, but on the species. Some animals have flesh which is delicate and easily torn, and a suitably delicate knife (like an exacto or scalpel blade) is required.

Plastic buckets, bowls, and measuring cups are important for tanning, since these will be needed to hold different cleaning, degreasing, and tanning solutions. Everything from recycled plastic paint buckets to the plastic bowls that hold margarine or whipped topping can be used for measurement and storage.

Once the tanning process is complete, then things like needles, thread, and glue are needed. Monofilament fishing line and even dental floss can be used to sew up a hide, while caulk, hot glue, and superglue will all be needed at some point during the mounting process. The right needles are critical- regular sewing needles will break, while needles that are too large will punch obvious holes in the hide, that can tear through later. Glue is also necessary for affixing things like eyes and teeth.

After mounting, things like hair brushes or chamois cloths are needed to help neaten a mammal’s coat to restore a realistic appearance, while toothbrushes, combs, and pet brushes can be used to straighten the feathers out on a bird specimen. Fish have their own problems to consider, and, while they won’t need to be brushed, will most likely require painting to regain the bright colors they had in life. So, for fish taxidermists, tools like oil panting kits or airbrushes are also key.
Some professionals might swear by one knife, or one type of glue, while others will prefer different ones. As a taxidermy hobbyist becomes more experienced with learning their craft, they’ll develop their own preferences for which tools they prefer to use in which situation.


Learning Taxidermy Fish

It’s easy to think that the larger an animal is, the more challenging it’s going to be to mount. However, with taxidermy, it’s often the smallest animals that pose the biggest challenge. For example, taxidermy fish require much more skill, patience, and expertise than they seem like they would at first glance.

The hide of each preserved animal has its own considerations that need to be taken into account. Most mammal hides are relatively easy to preserve, however the different structure and constitution of fish, lizard, and bird skins requires different solutions to treat and preserve properly. For this, this generally consists of borax, or a paste available in fish taxidermy kits. After the fish is opened up and the bones, meat, and organs are removed, the skin must be treated with this solution or paste to keep it from decaying. Since the skin is cut away from the flesh in such a way that the head and tail remain intact, the eyes and brain will also have to be removed.

Learning Fish TaxidermyAfter that, some taxidermists use special preservation solutions to treat the head and tail, while others soak the whole skin in a borax solution, or rub the inside with a borax paste. Treating and drying the skin will cause some loss of color in the scales, so having references available for what the fish looked like in life will be an enormous help after the process is complete.

After the skin is treated, the inside is powdered with extra borax. At this point, most taxidermists either begin packing the fish with sawdust, or stretch the skin over a polyurethane mannequin. Either method is a matter of personal preference. Once the fish is properly mounted, it must be allowed to air-dry in an area where it will receive adequate air circulation, and no moldy spots will be able to develop. The combination of treating the skin and allowing it to dry will cause the color to fade at this point, but, once the mount is thoroughly dry, oil paints or special airbrushing kits can be used to go back and add lifelike color to the scales. This is why having a good reference (either a guidebook to that species of fish, or photos or video taken of the fish during life, or very shortly after death) is crucial, since sloppy paint application will ruin the natural look and aesthetic effect of an otherwise well-done mounted animal.

Though fish taxidermy can take a bit more time and care than other forms of the art, the results are well worth it. Taxidermy fish make stunning décor pieces, particularly when in the hands of a patient, skillful painter that can accurately render all of the details of a living fish.

Learning About Taxidermy Habitat Supplies

In lieu of simply mounting an animal hide, some taxidermists prefer to create a scene with the animal mounted on a realistic portion of its habitat. Squirrels climbing down stumps, or birds perched on branches, are both popular subjects for crating taxidermy habitats. To do so properly, however, requires some specific supplies.

Aside from the usual knives, fleshing tools, sewing needles, buckets, and other things needed for taxidermy itself, creating realistic habitats requires two basic types of things- the base of the habitat, and supplies to make it look more natural. The base of the habitat will vary, of course, depending on the species of animal that is going to be mounted. Usually, wood, foam, or hardware cloth is used, while a mixture of paper-mache, plaster, or a similar material is layered over to create a hard, ground-like base. Keeping a selection of base materials in different sizes is a good idea, as they’re generally inexpensive, don’t take up very much space for storage, and can be mixed up as needed.

Taxidermy Hobbyist - Learning About Taxidermy Habitat SuppliesAfter the base of the habitat is chosen, then come the supplies to make it look natural. Slabs of slate, artificial rocks, and driftwood are popular additions, particularly since they can be easily cut, sculpted, or painted to fit the taxidermist’s needs. Though habitats will necessarily vary depending on the mounted animal, every taxidermist should keep a few sizes of artificial rocks and driftwood on hand. Once the right materials are chosen, they must be assembled on the base. Caulk, glue, epoxy, or resins are all employed, depending on whether natural wood, stone, or an artificial equivalent is used for decoration.

Often, habitat decorations will be the right size, but the wrong color. This can be fixed with something as simple as a few coats of paint, or as elaborate as artificial water or snow. Generally, rock, driftwood, or both are glued or epoxied to the base in a realistic tableau, then painted to hide any evidence of gluing. Small bits of natural moss or silk plants make great aesthetic additions to habitats for forest animals, and can be easily purchased from taxidermy supply or craft shops. Every taxidermist who enjoys making habitats for their mounts should keep some dried moss, a set of paints, and a variety of adhesives in their toolkit, since these relatively simple supplies can be used to create a number of very different scenes.

Habitats are, above all, artistic creations, and each artist has the tools and materials they prefer to work with.
With some practice and a good eye, it’s possible for a taxidermist to make a habitat even more beautiful and valuable than the mounted animal itself.

European Skull Mounts Supplies

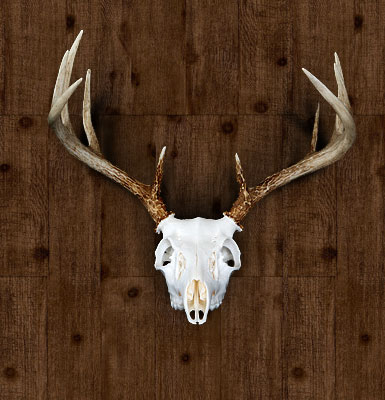
Mounting skulls European-style is a popular way to show a hunting trophy without having to devote the space that a full-body or shoulder mount would require. European skull mounts are also easy for a novice taxidermist to learn to do. To create this type of mount, three types of basic supplies are needed- supplies to clean the skull, protect it, and mount it on an attractive display.

Cleaning the skull is arguably the hardest part. A variety of methods exist, and one of the most effective supplies to do so isn’t actually a supply at all. Dermestid beetles are used by most museums and a number of professional taxidermists, so, if at all possible, these should be obtained. These beetles eat the flesh and soft tissue off of the skull without damaging it, shrinking it, or making it brittle. Without these beetles, the skull will need to have the flesh stripped from it manually. To do so include a large pot, dish detergent, baking soda, and a dull knife. The pot should be filled with water and brought to a boil, some dish detergent and baking soda added, and the skull should be placed inside. Every ten minutes, the skull should be removed and scraped with the knife, until it is clean. Borax should always be kept on hand for cleaning small cavities a knife can’t reach, as well as for rubbing on the skull afterward to absorb any excess moisture that can cause unwanted odors or attract bugs.

The next step requires its own specific supplies. The skull should be bleached, and many different solutions and recipes exist to do so. However, since most of these chemicals are only available through laboratory or professional taxidermist suppliers, a hobbyist or beginner might be better off purchasing a kit with skull bleach included. After that, some form of protective coating should be applied, like that used to protect outdoor furniture. These generally consist of acrylic or polyurethane, come in a spray can, and are readily available at craft and hobby stores.

The last supplies needed are a display plaque or pedestal, and a means of securing the skull to it. Screws are fairly common and easy to use, and have the advantage over glue in that they won’t degrade with time. Plaques and pedestals are usually wood, though some interesting looking displays have also been made out of slate or other types of stone.

Learning to make a European skull mount is a great way to become introduced to the art of taxidermy. Though it seems easier than mounting a whole hide, making sure to have the right supplies for the job can make it even easier, and create an even more beautiful finished mount.

Shoulder Mount Supplies

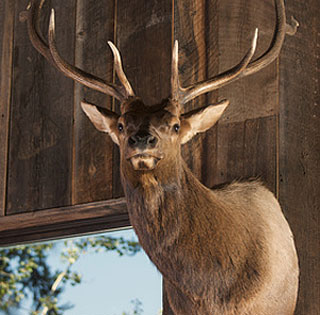
Shoulder mounts are so named because they display a mounted animals head, neck, and upper shoulder area. They’re good for beginning taxidermists who want to create something a bit more complex than a skull mount, but don’t have the time, space, or expertise to make and display a full-body mount. However, shoulder mounts still require some of the same supplies that mounting a whole hide does.

First of all, skinning the animal should be taken into consideration. Depending on the species, this will require knives, scalpels, or fine blades, as well as tools for removing bits of muscle and soft tissue that adhere to the inside of the skin. Specialized fleshing tools are useful for this, though some hobbyists use sharpened spoons for small animals, carefully scraping the inside of the hide until it’s clean.

After the skin is cleaned and prepared, supplies are needed to properly preserve the hide. Tools like plastic buckets, paint stirring sticks, and plastic bowls are useful for mixing and preparing tanning or pickling solutions, as well as allowing hides to soak. The hides of some species can be preserved with borax or dry borax, but beginners might want to use a specific kit until they develop a preference for one chemical over another.

Once the hide is preserved, other supplies like needles, thread, different types of glue, or hide paste are use to secure the hide to the mannequin. While the type of adhesive or method of securing the hide will vary from taxidermist to taxidermist, the mannequin itself will be species (and possibly age or gender) specific, and most likely made of polyurethane foam. Some kits for creating shoulder mounts come with all of these supplies, while others will leave the mannequin separate, in which case it is up to the hobbyist to choose an appropriate one for their project. Depending on the type of animal, other supplies like ear liners or small cards can be used to give the ears an alert, lifelike appearance, and glass or acrylic eyes are generally placed on the mount as a finishing touch.

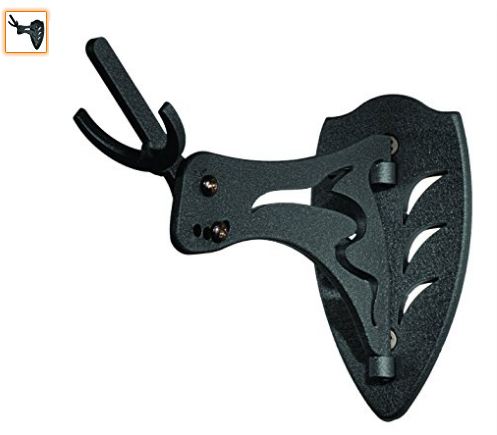
After the hide is mounted and the ears and eyes properly in place, the last supplies needed are to actually hang the mount. Some prefer to hang it directly on a wall, while others prefer to place it on a wooden plaque prior to hanging. Whichever the case, things like screws, saw tooth hangers, wood, and picture hanging wire can all be used to place the mount on a plaque or wall.
Though creating a shoulder mount might seem equally as complicated as mounting a whole hide, their smaller size makes them ideal for novice taxidermists to try. By choosing a selection of good quality supplies, even someone new to the process can create a professional-looking shoulder mount.